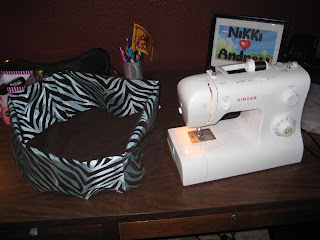
What you'll need:
- Sewing machine
- Thread
- Two types of fabric
- Polyfill fiber
- A cute, sleepy pet
STEP ONE: Cutting & measuring fabric
Cut out two circles that are the length of your pet, plus 2 additional inches. My cat was 15 inches, so I made a 17 inch circle. I suggest drawing a "+" shape and connecting the points with semi-circles.
Also, cut out a long strip, using pi (yay for math actually being beneficial!). It was 17 x 3.14, in my case. I made mine 7 inches high, but it really depends how tall you want the tube to be.
STEP TWO: Sewing the pieces together
Fold the fabric for the tube in half, and sew it to the two circles. Pretty easy, right? :p Should look something like this. IMPORTANT: Leave a space big enough for your hand to fit through so you can stuff it!
STEP THREE: Stuffing tiemz!
This part is a pain in the ass. Stuff it as much or as little as you'd like. I refrained from putting a lot of stuffing in the actual bed part, cause it makes it more squishy.
STEP FOUR: Finishing steps!
Sew the stuffing opening, cut off any excess fabric from the bottom side, and you're done! Now you have a custom fit and custom designed pet bed for your favorite pet. <3 Thanks for reading, and happy sewing! Let me know if you tried it, I'd love to know if I was of help to anybody.
- Nikki


