July 26, 2012

Strawberry-Rhubarb Pie

This is seriously the best pie I've ever had.  Like, in my entire life.  Everyone who has eaten it agrees with me.  It's a strawberry-rhubarb pie made with a buttery, flaky crust.  I have variations for a tart version, and a sweeter version.  In my opinion, the sweeter version is absolutely perfect.  It's the perfect combination of tart and sweet, but I know there are some people that just adore tart fruit pies.


Ingredients:

1.5 lbs fresh rhubarb
1 container of fresh strawberries
3/4 cup white sugar (or 1/3 cup if you like it on the tart side)
1/4 cup brown sugar
1/4 cup instant tapioca
1 tablespoon lemon juice
1 tablespoon margarine
1/4 teaspoon salt
1 egg (for glazing)

Crust:

2 sticks of cold, unsalted butter
2 1/2 cups flour
1 tablespoon salt
1 tablespoon sugar

Step one:
To begin, preheat your oven to 400 degrees.  Now we're going to make our crust.  In a medium bowl, combine all crust ingredients and mix them with your hands!  Yay!  You don't want to mix it too well, though, which is why we're using our hands.  The more bits and chunks of butter you have in the dough, the more air pockets will form to make the flaky crust we're wanting.

Step two:
After making the crust, divide the dough into two parts and seal both with plastic saran wrap.  Put the dough into the freezer to keep cool while you cut the fruits up and mix the filling.  We don't want the butter to melt.

Step three:
Cut up your fruits!  I cut my rhubarb into 1/2 inch slices and my strawberries in fourths.  Once they're all cut, dump them into a large mixing bowl and add sugars, lemon juice, tapioca, and salt.  Do not add the margarine and egg yet!

Step four:
Get your crusts out of the freezer and roll them out into sheets that will fit your pie pan. Place one into the pan and press it firmly.  Then, dump your filling into the crusted pie pan.  Spread it out evenly, and dot the margarine all around the filling.  Then, put your second sheet of crust on top of your pie and press it into the bottom layer of the crust to make it whole. 

Step five:
Decorate your pie however you'd like.  I pressed my thumb around the edges and cut 4 slits into the top, but it's totally up to you how you'd like to make it look.  After your decorative touches, beat your egg and with a rubber brush, brush the egg all over the top of the pie crust.  Use as much of the egg as you can!  You want to be very generous with this.

Step six:
Put your pie in the oven and bake for 20 minutes at 400 degrees.  After 20 minutes have passed, reduce heat to 350 and bake for another 20-30 minutes or until perfectly brown.  Let your pie set for at least 2 hours before serving so that a jelly-like consistency will form!


And there you have it!  An amazingly perfect pie for pretty much any time of the year. :)  Enjoy your dessert and all of the compliments you'll get on this one, because it's sure to impress!

- Nikki

January 15, 2012

Tutorial: Pet Bed

Pet stores have a terrible selection of pet beds. I never can find a bed that matches the colors of our living room. Because of this, I decided to make one myself! This is my first ever sewing project and sewing tutorial, so I was pretty intimidated and didn't expect it to come out too great. But, surprisingly, I like it a lot and wanted to share this tutorial for anyone who is interested in making one for their sweet kitteh.


What you'll need:

  • Sewing machine
  • Thread
  • Two types of fabric
  • Polyfill fiber
  • A cute, sleepy pet

STEP ONE: Cutting & measuring fabric
Cut out two circles that are the length of your pet, plus 2 additional inches. My cat was 15 inches, so I made a 17 inch circle. I suggest drawing a "+" shape and connecting the points with semi-circles.
Also, cut out a long strip, using pi (yay for math actually being beneficial!). It was 17 x 3.14, in my case. I made mine 7 inches high, but it really depends how tall you want the tube to be.


STEP TWO: Sewing the pieces together
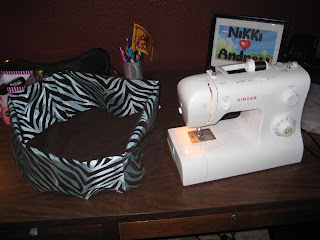
Fold the fabric for the tube in half, and sew it to the two circles. Pretty easy, right? :p Should look something like this. IMPORTANT: Leave a space big enough for your hand to fit through so you can stuff it!


STEP THREE: Stuffing tiemz!
This part is a pain in the ass. Stuff it as much or as little as you'd like. I refrained from putting a lot of stuffing in the actual bed part, cause it makes it more squishy.


STEP FOUR: Finishing steps!

Sew the stuffing opening, cut off any excess fabric from the bottom side, and you're done! Now you have a custom fit and custom designed pet bed for your favorite pet. <3 Thanks for reading, and happy sewing! Let me know if you tried it, I'd love to know if I was of help to anybody.


- Nikki

December 23, 2011

Recipe: Hard-Boiled Eggs

Yep, this is going to be an overly-simple, most likely unnecessary recipe for hard-boiling eggs. I realize they're something almost everyone knows how to make, but they're so simple that I seem to forget how to make them every time I need to make my lizard's favorite food (I'm such a bad parent) or as breakfast snacks for my boyfriend (I'm such a bad girlfriend).


RECIPE:

1. Cover however many eggs you're wanting to make in an appropriately sized pot, and fill it with water until they're covered completely.

2. Remove the eggs from the water, and set them aside. Don't let them roll off the counter and crack!

3. Over high heat, boil the water on until it's bubbling.

4. With a spoon or ladle, slowly ease the eggs one-by-one into the boiling water.

5. Reduce heat, and cover the pot to let the eggs simmer for about 10-15 minutes. (Note: Brown shelled eggs have thicker shells than white shelled eggs. This makes them harder to boil, but also more ideal for boiling because they are more crack-resistant.)

6. Cool them in the refrigerator for a couple of hours, crack, peel, and feed them to your lizard! ..or yourself, but I think they're kinda gross. :(

December 13, 2011

About me


Hai! I'm Nikki, the creator of this lovely blog. I live in Portland, OR with my boyfriend (Andrew), kitty (Gary), and lizard (Slurp). I'm a full-time student majoring in Computer Information Systems and have a part-time job in retail (yay -_-).

 I've always loved to cook and learn new recipes. My mom was super good at it, and I guess the family trait just rubbed off on me. Cooking is pretty much something I know that I'll love doing forever. To be honest, I have no idea how my food turns out to be so delicious, because our smoke detector goes off at least 3 times a month due to kitchen-related adventures.. but, I guess that's just where my natural talent and/or awesomeness kicks in.

As for craftting, unlike most crafters, I actually haven't always been an artsy-kinda person. I've always appreciated unique and handmade things, but I never really thought I'd be good at it myself. I think my interest and passion to attempt at handmaking things began when I went to a local crafting market here in Downtown Portland. After I saw that you could create more functional and purposeful things than depressing paintings and other dumb things to hang on your wall, I got a sudden urge to make things of my own.

Anyway, I made this cooking blog to share my recipes with however many people decide to try them, to learn from others, and to have an easy way for myself to look back on all of the things I've made. I hope you enjoy my blog as much as I enjoy writing it for you!

Nikki